Disclosure: this article may contain affiliate links. If you buy through them, I may earn a commission at no extra cost to you.
Most freelancers start tracking time to get paid for it, yet the step between “hours logged” and “invoice sent” is where things fall apart. Toggl Track invoicing promises to close that gap: you track time, attach rates, and turn a report into a PDF invoice without retyping anything. The question is whether it is enough to replace a separate invoicing app, or whether it is only a convenient shortcut.
To answer that, I walked through a full month-end billing run using Toggl’s own help documentation and pricing page: setting rates, cleaning up entries, building the invoice, sending it, and making sure the same hours are not billed twice. At the end you will know exactly where Toggl does the job and where you still need another tool.
First, a quick note on the name
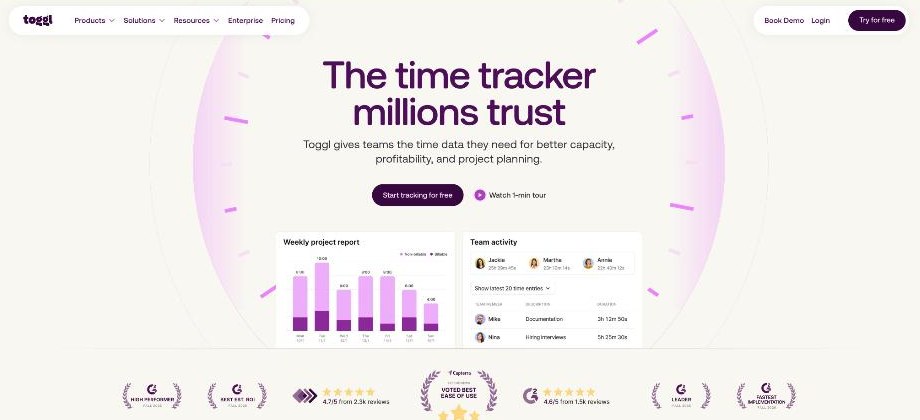
If you visit Toggl’s website today, you will see the product presented simply as Toggl, with time tracking, capacity management and project planning together. A banner on the site says that Toggl Track and Toggl Plan remain available and supported for existing users. Toggl’s newer documentation refers to “Toggl 2.0,” while the invoicing guide is still written for Toggl Track. The workflow below uses both sets of official docs, so the menus in your workspace may be named slightly differently depending on which version you are on.
What you need before the first invoice
Toggl’s invoicing works from reports, so the invoice is only as good as the data underneath. Three things need to be in place before month-end.
1. Billable rates
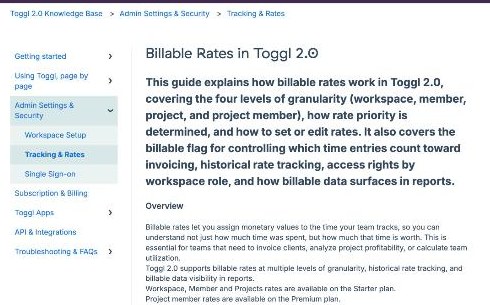
Billable rates are hourly amounts that turn time into money. According to Toggl’s documentation, rates can be set at four levels, and a more specific rate always wins over a more general one:
- Project member rate: a specific person on a specific project (Premium plan).
- Project rate: anyone working on that project.
- Workspace member rate: that person across all projects.
- Workspace rate: the workspace-wide default.
Workspace, member and project rates are available on the Starter plan. For a solo freelancer, the practical setup is simple: one workspace default rate, plus a project rate for any client who pays a different amount. You only need Premium if different team members bill different amounts on the same project.
Each rate has an amount (decimals are fine, such as 75.50), a currency, a start date and an optional end date. Toggl keeps the history of every rate, so when you raise your price in the middle of a month, older time entries keep the old rate. That detail matters more than it sounds: it means a price change will not silently rewrite last month’s numbers.
2. The billable flag
Rates say how much an hour is worth; the billable flag says whether an hour should be charged at all. When a project or task is marked billable, time tracked against it is flagged as billable automatically. You can remove the flag from individual entries, for example when you had to redo work because of your own mistake. Do that cleanup during the month, not on invoice day, and the invoice will need almost no editing.
3. One project per client (or per contract)
Because a Summary invoice shows one line per project, the way you structure projects decides how the invoice reads. One project per client works for simple retainers. If a client wants to see separate lines for design, development and meetings, create those as separate projects or tasks from the start.
The month-end billing run, start to finish
Here is the sequence I would follow on the last working day of the month.
Step 1: Open the right report and filter it
Toggl’s help article is clear that you should filter the report before creating the invoice, so only the entries you want to bill appear. Typical filters are the client or project, the date range for the month, and billable entries only. If you use the “paid” tag workaround described below, add a filter for entries that are not tagged paid.
Step 2: Choose Summary or Detailed
The report you start from decides how much detail your client sees:
- Summary report produces a summarized invoice, with each line showing the project name, total time and total amount for the period.
- Detailed report produces a line-by-line invoice with each time entry listed separately.
Agencies and retainer clients usually prefer the Summary version. Clients who audit hours, or who pass your invoice on to their own client, often want the Detailed version.
Step 3: Create the invoice
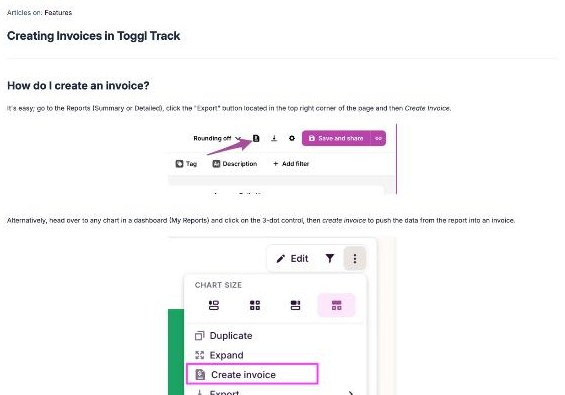
From the Summary or Detailed report, click the Export button in the top-right corner and choose Create Invoice. Toggl also lets you create an invoice from a chart on a dashboard via its three-dot menu.
Step 4: Fill in the invoice details
Toggl opens an edit view pre-filled from your report. You can then edit or add:
- Billing details for who gets billed, and where payment should be made
- Purchase order number and invoice ID
- New invoice items, such as a fixed startup fee, through a custom charge
- Tax
- A custom memo at the footer, which is a good place for payment terms and bank details
- The currency
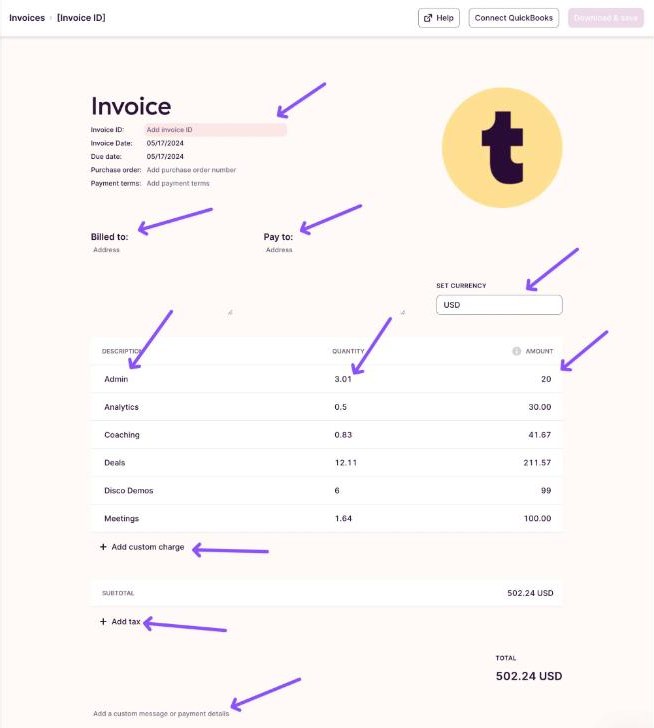
Two limits to know here. First, the invoice layout, template and font cannot be changed. Second, your edits apply only to the current invoice; terms, IDs and other edits do not carry over to the next one. Keep a short text snippet with your standard payment terms and billing address so you can paste them in each month.
Step 5: Download and send
Click Download Invoice to get a PDF, then email it to your client from your own inbox. Toggl’s Invoices page, in the main sidebar, lets you view and download previously created invoices, duplicate a past invoice, delete invoices, and send invoices to QuickBooks, which Toggl lists as a Starter feature.
Step 6: Mark the hours as billed
This is the step most people skip, and it is where double-billing comes from. Toggl’s help article says there is no built-in way to mark time entries on an invoice as paid. Its suggested workaround: add a “paid” tag to the entries you have billed, then filter your next report with Tags is not paid so those entries never appear again. I would name the tag “invoiced” rather than “paid,” because sending an invoice and receiving the money are two different moments.
Which Toggl plan does this workflow need?
Here is how the current plans line up for client billing, based on Toggl’s pricing page and feature comparison.
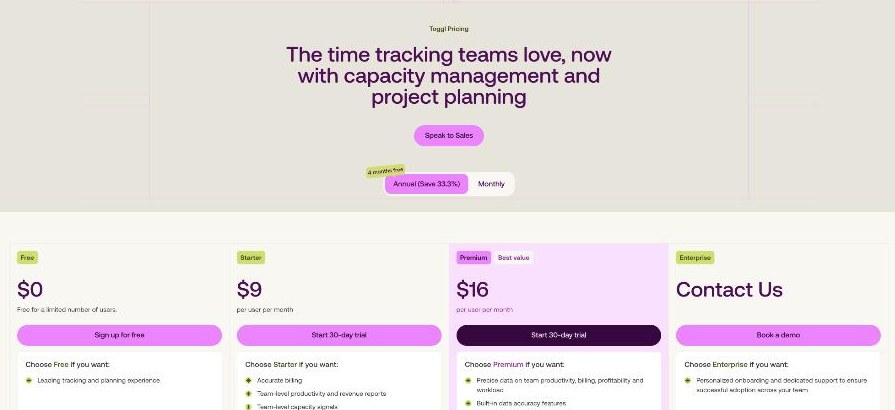
| Plan | Price per user per month | What it adds for billing |
|---|---|---|
| Free | $0 (free for a limited number of users) | Timers, summary and time log reports, PDF exports; invoices show the Toggl logo |
| Starter | $9 billed annually, $12 billed monthly | Billable rates, rounding, your own company logo, CSV/XLSX exports, report sharing, scheduled report emails |
| Premium | $16 billed annually, $24 billed monthly | Project member rates, fixed fee projects, labor costs and profitability reports, timesheet approvals, required fields |
| Enterprise | Contact sales | Custom roles, dedicated support and onboarding |
Starter and Premium both come with a 30-day trial. For the workflow in this article, Starter is the realistic minimum: billable rates live there, and Toggl’s invoicing guide says that removing the Toggl logo and adding your own requires a paid plan. Rounding, also a Starter feature, is useful if your contract says you bill in 15-minute increments.
Premium earns its price if you run a small team with different rates per person per project, or if you sell fixed-fee projects and want to see whether they are profitable.
Where Toggl stops and an invoicing app takes over
After walking through the whole run, here is my honest split.
Toggl handles this well
- Turning filtered, billable hours into invoice lines without retyping.
- Keeping rate history so price changes don’t rewrite past months.
- Adding a fixed charge, tax and a payment memo.
- Producing a clean PDF in a few clicks, and pushing to QuickBooks on Starter.
You will still want something else for
- Payment tracking. There is no built-in paid status; the tag trick only prevents double-billing.
- Sending and reminders. You download a PDF and email it yourself.
- Branded templates. The layout, template and font are fixed.
- Recurring invoice settings. Edits don’t persist, so terms must be re-entered or copied by duplicating a past invoice.
For a freelancer with a handful of clients who pay by bank transfer, Toggl’s invoices are enough. Once you need online payments, automatic reminders or accounting reconciliation, use Toggl for the time data and push it to accounting software such as QuickBooks, or export a report and invoice from your accounting tool.
If you are tidying up the rest of your client workflow at the same time, my guide to setting up Calendly for freelancers covers the intake side, from first inquiry to a booked, paid session.
My verdict
Can Toggl Track handle your client invoicing? For a solo freelancer or a small agency billing by the hour, mostly yes. The combination of billable rates, the billable flag, filtered reports and Create Invoice turns a month of timers into a professional PDF in minutes. Starter is the plan to choose, because that is where billable rates, rounding and your own logo live.
What Toggl does not do is chase the money. Plan to tag billed entries yourself, send invoices from your own email, and track payments elsewhere. If that split works for you, it is one of the simplest ways to make sure every billable hour actually reaches an invoice.
FAQ
Can you create invoices in Toggl Track for free?
Yes. Toggl’s help article says invoices created on the Free plan include the Toggl logo on the PDF. To remove it and add your own logo you need a paid plan, and billable rates themselves are a Starter feature.
Can I mark a Toggl invoice as paid?
Not directly. Toggl suggests tagging billed time entries (for example “paid”) and filtering future reports with Tags is not paid so the same hours are never billed twice.
Can I customize the Toggl invoice template?
You can edit the details, such as billing information, invoice ID, PO number, custom charges, tax and a footer memo. The layout, template and font cannot be changed.
Which billable rate does Toggl use when several are set?
The most specific one: project member rate first, then project rate, then workspace member rate, then the workspace default.
Does Toggl connect to QuickBooks?
Yes. From the Invoices page you can send invoices to QuickBooks, which Toggl lists as a Starter feature.